How to Use the AIPRM Prompt Wizard
- Role: Identifying the persona that you want ChatGPT to assume
- Context: Providing necessary background information
- Task: Outlining the task to be performed
- Constraints: Specifying the boundaries of the task
Choose from dropdown options or input your details to build prompts that are specific and detailed, guiding ChatGPT to better understand and execute your requests.
The Prompt Wizard is specifically designed to assist beginners in crafting simple, effective prompts. By using this tool, newcomers can smoothly navigate the initial stages of prompt creation without a steep learning curve. Whether it’s selecting from predefined options or entering your own prompt details, building your first prompt is now just a matter of a few clicks.
Read More:
How to Access the Prompt Wizard #
Step 1. Navigate to the AIPRM dashboard within ChatGPT.

Step 2. Click on the “Own” tab.

Step 3. Click the plus button labeled “Add Private Prompt.” This will open up the prompt template form, ready for you to build your prompt.
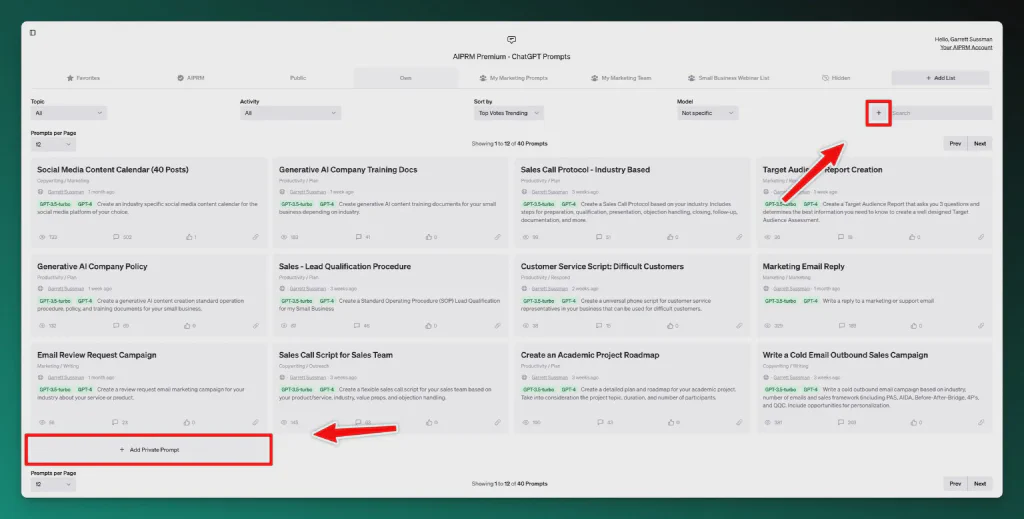
In the Prompt Template Form, you’ll see the Basic Prompt Wizard Template.

Step 4: Fill out the Prompt Builder template using the dropdown or fill-in options.
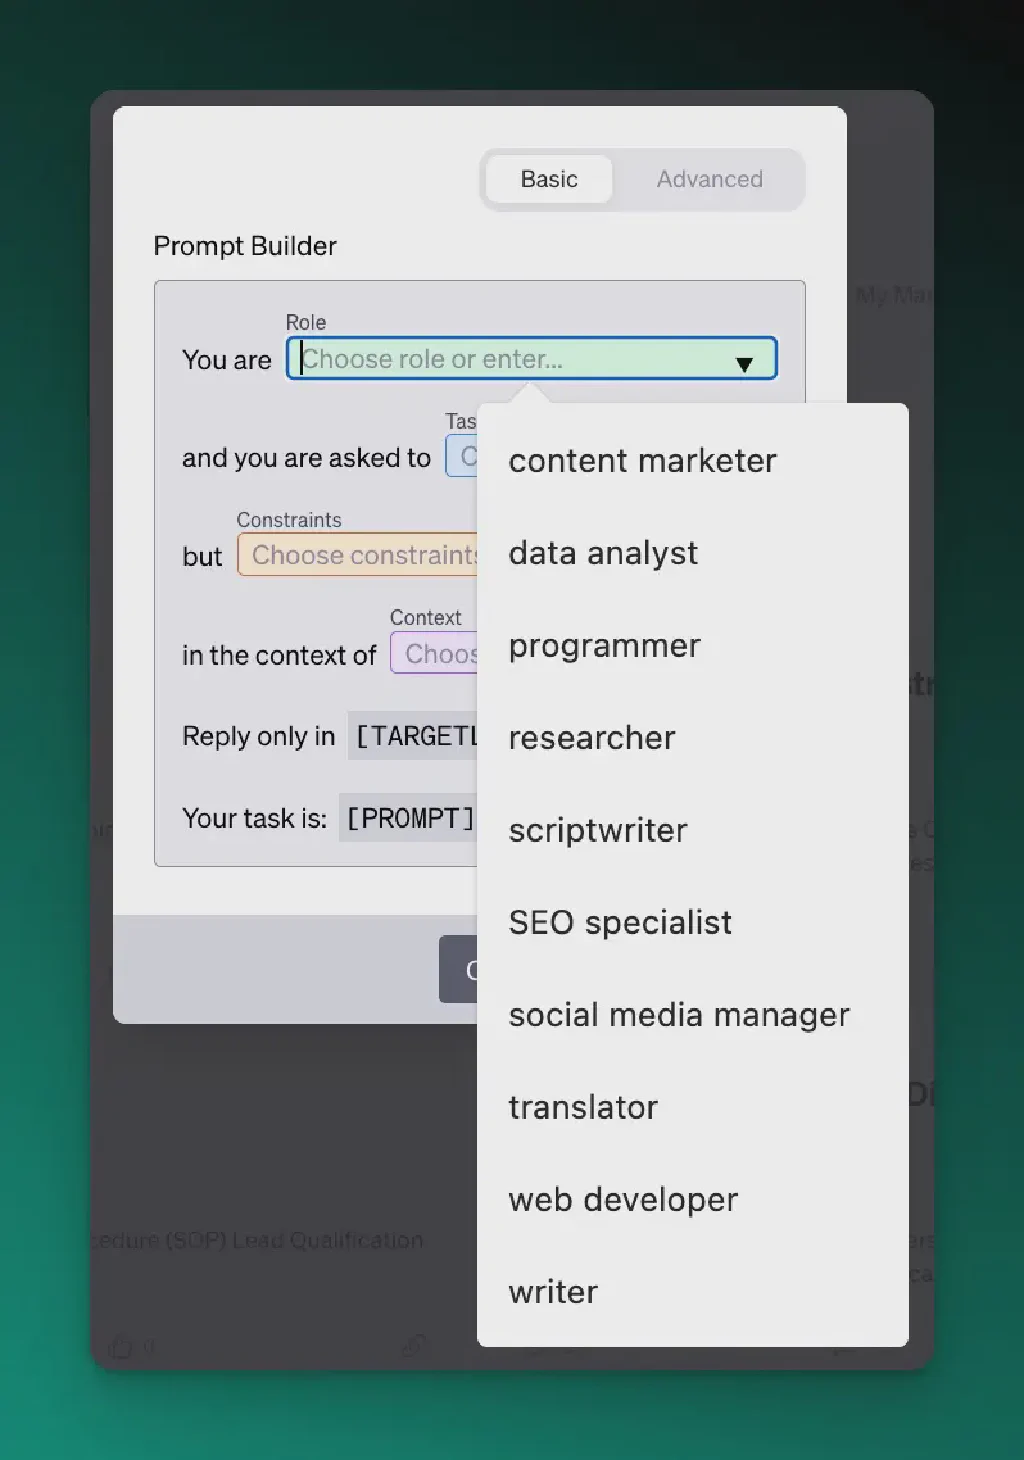
Role:
- Click on the drop-down menu labeled “Role.”
- Select a predefined role from the list or click the field to define a custom role.
Pre-built options include:
- content marketer
- data analyst
- programmer
- researchers
- scriptwriter
- SEO specialist
- social media manager
- translator
- web developer
- writer
Task:
- Click on the drop-down menu labeled “Task.”
- Select a predefined task from the list or click the field to define a custom task.
Pre-built options include:
- analyze website content and provide SEO recommendations
- conduct sentiment analysis on customer reviews
- create a content calendar for social media platforms
- create high-converting ad copy for Facebook
- develop a customized website
- generate catchy titles, meta descriptions, and tags for YouTube videos
- generate keywords for SEO optimization
- rewrite articles to be 100% unique and human-like
- translate text from one language to another
- write a unique SEO optimized article
Constraints:
- Click on the drop-down menu labeled “Constraints.”
- Select any predefined constraints from the list or click the field to define custom constraints.
Pre-built options include:
- adhere to ethical guidelines and avoid misleading information
- adhere to SEO best practices and guidelines
- content must be 100% unique and pass plagiarism checks
- ensure clarity and coherence in generated content
- ensure outputs are in accessible and user-friendly formats
- follow brand guidelines and tone of voice
- generate content based on established knowledge up to the last training
- provide accurate and reliable information in research tasks
- provide outputs in specified formats
Context:
- Click on the drop-down menu labeled “Context.”
- Select a predefined context from the list or click the field to input a custom context.
Pre-built options include:
- academic research and writing
- content marketing and SEO strategy
- data analysis and insights for business decision-making
- e-commerce product descriptions
- fiction and creative writing projects
- market research and competitive analysis
- multilingual translation and localization
- personal branding and professional development
- social media advertising and campaigns
- website development and optimization
Pro-Tip: The Prompt Wizard includes the [TARGETLANGUAGE] variable and the [PROMPT] variable in your basic template.
- The [TARGETLANGUAGE] variable allows the prompt user to select the output language of ChatGPT. This variable is also required to publish the prompt publicly.
- The [PROMPT] variable allows the user to add any other additional task, context, or constraint information for the prompt.
Read more:
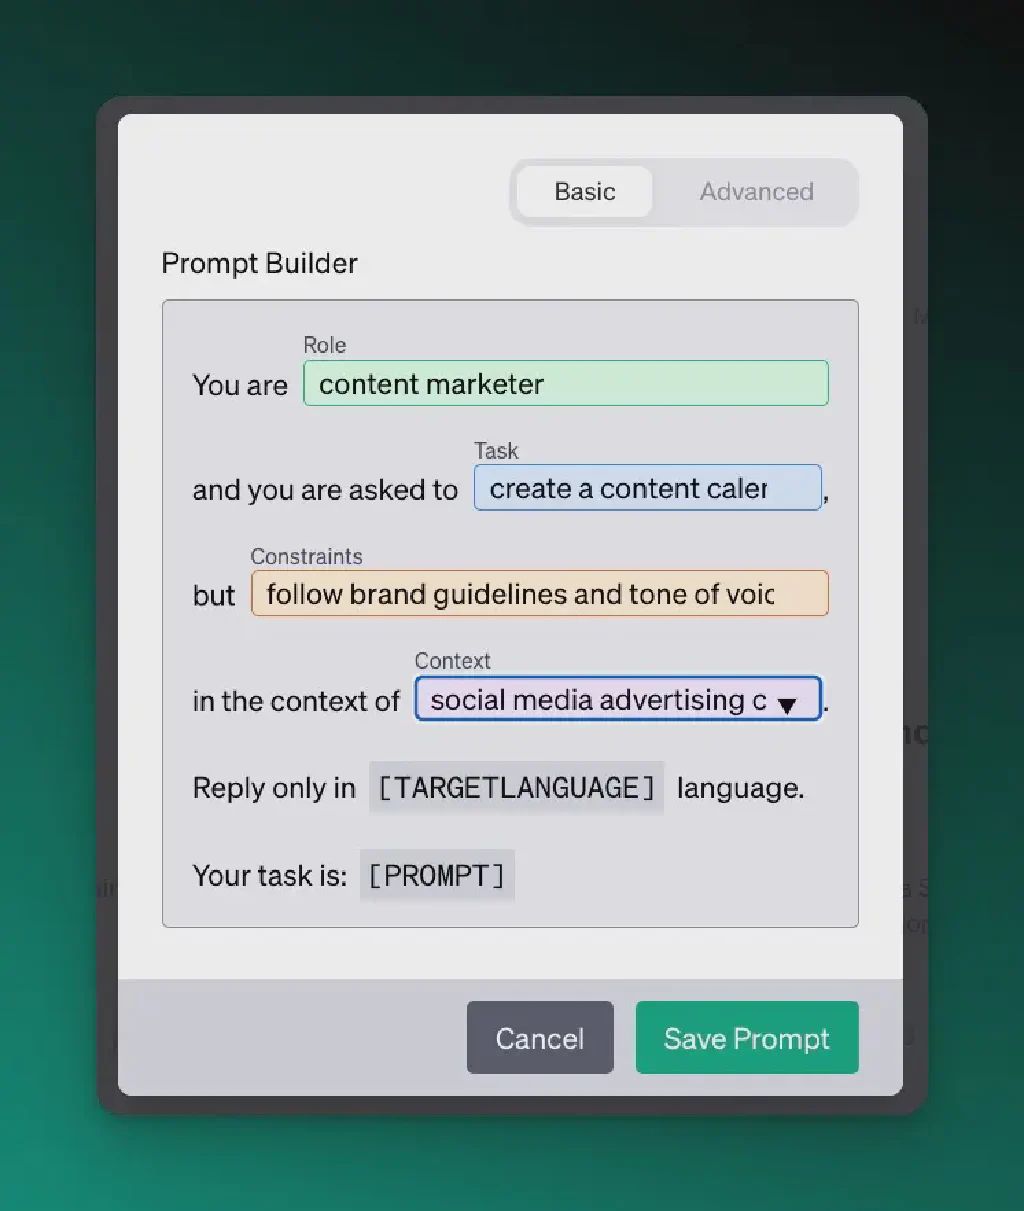
Step 4: Save your prompt (or toggle to the Advanced Template).
- Review your selections and input to ensure they meet your requirements.
- Click “Save” to store your prompt for later use.
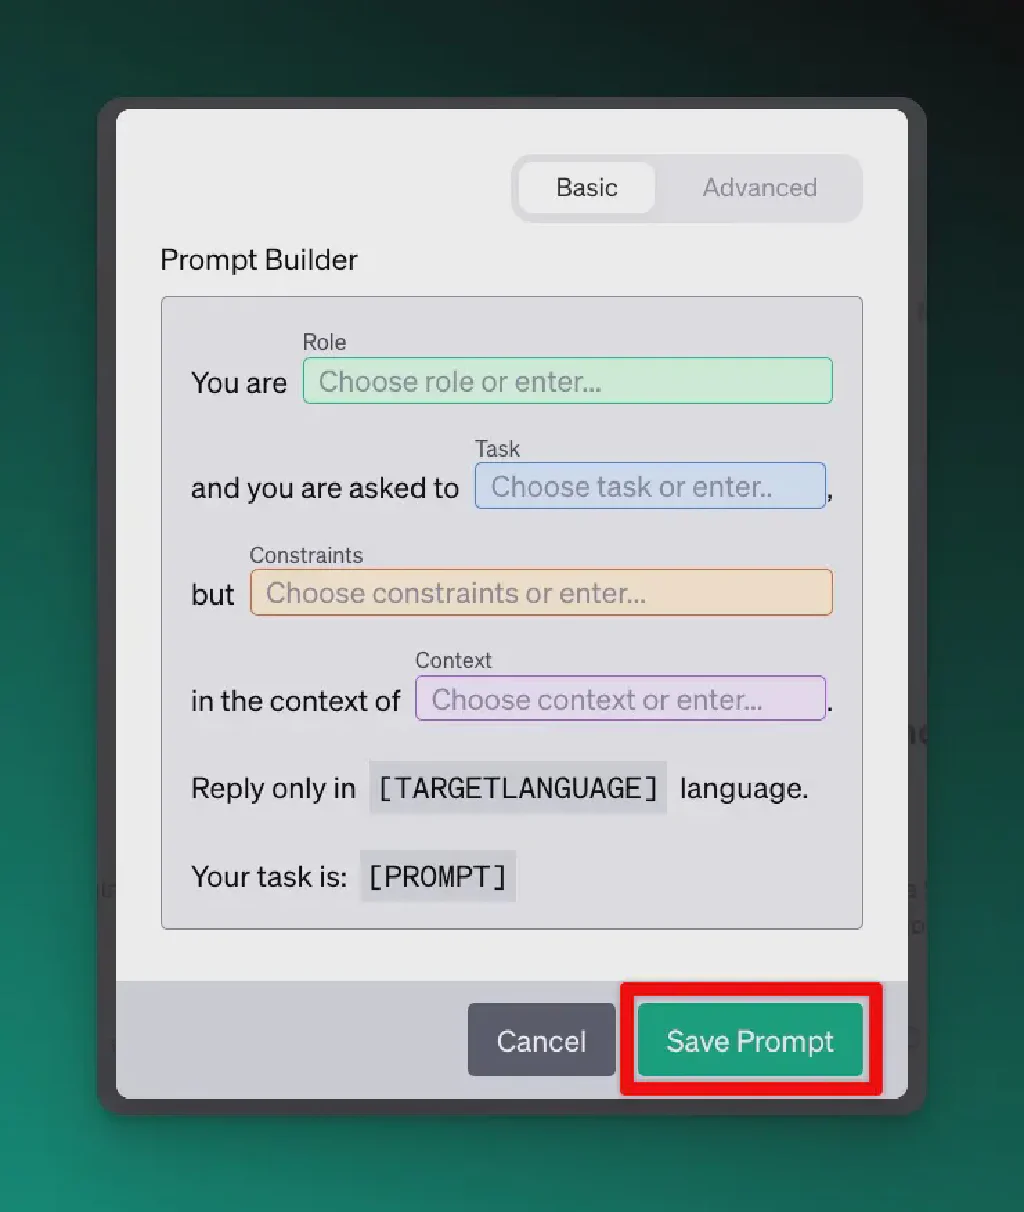
- If you wish to add more details to your prompt, toggle over to the advanced version of the prompt template by clicking on the “Advanced” option.

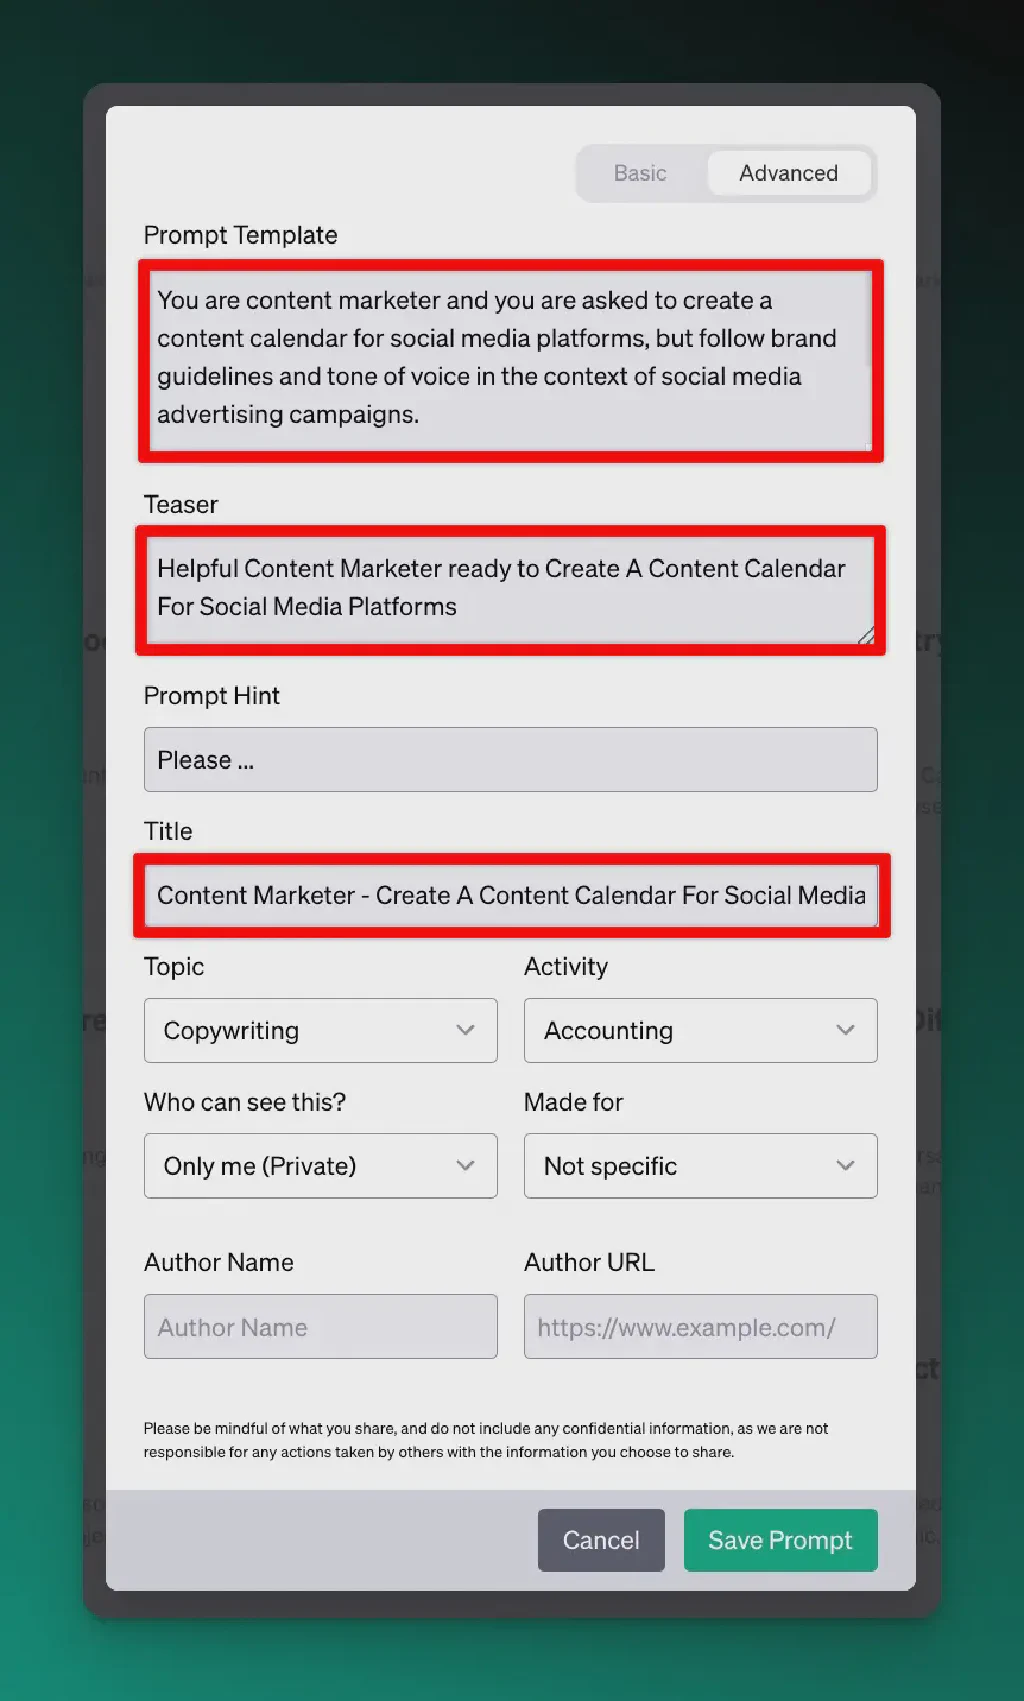
- In the advanced template, you can add any additional information as needed to refine your prompt. You’ll see your selection integrated into the Template, Teaser, and Title.
Step 5. Once your prompt has been saved, wait a few moments, refresh your browser, and navigate back to your own prompts tab to find your published prompt.
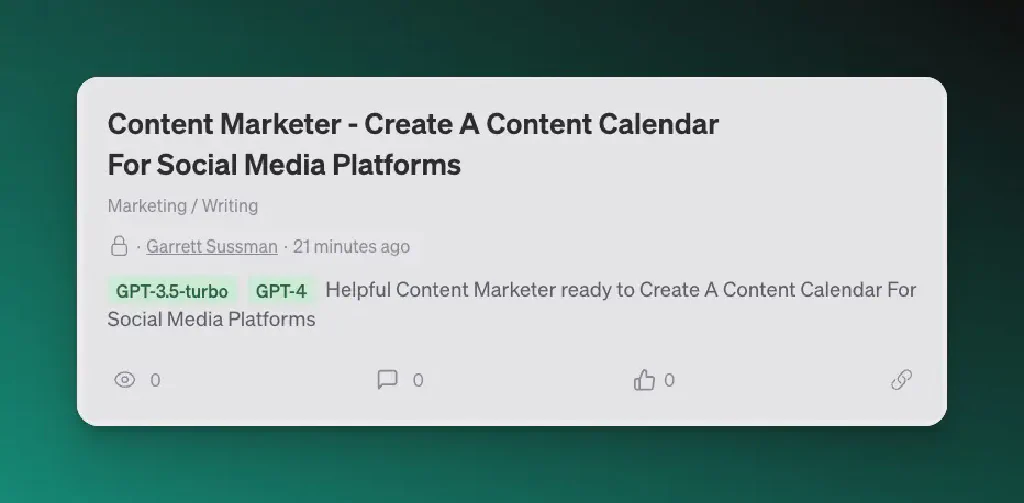
You have now successfully created and deployed a prompt using the AIPRM Prompt Wizard. Remember, the feature aids in crafting solution-focused messaging to tackle the challenges of content creation effectively. Use it to streamline your workflow and maintain consistency across your organization.
As you build more prompts, feel free to jump straight to the advanced template for more complex prompts.